Category: Damp & Moisture

Export guides on damp and moisture problems in buildings, including rising damp, penetrating damp, condensation and mould. learn how to identify causes, understand treatment options.

  • Damp in Chimney Breast: Causes, Diagnosis & Fixes (UK Guide)

    Damp in Chimney Breast: Causes, Diagnosis & Fixes (UK Guide)

    Damp in a chimney breast is a common problem, particularly in older UK properties and is often caused by penetrating damp. Staining, peeling wallpaper, crumbling plaster, or a musty smell around the chimney area often indicates trapped or penetrating moisture.

    The cause can vary — from rainwater ingress to condensation in unused flues — so correct diagnosis is essential before carrying out repairs.

    Why Are Chimney Breasts Prone to Damp?

    Chimneys are exposed to:

    • Heavy rainfall
    • Wind-driven rain
    • Temperature differences
    • Internal condensation
    • Failing flashing
    • Porous brickwork

    Unlike standard walls, chimneys are exposed on multiple sides and often extend above roof level, increasing vulnerability.

    Common Causes of Damp in Chimney Breasts

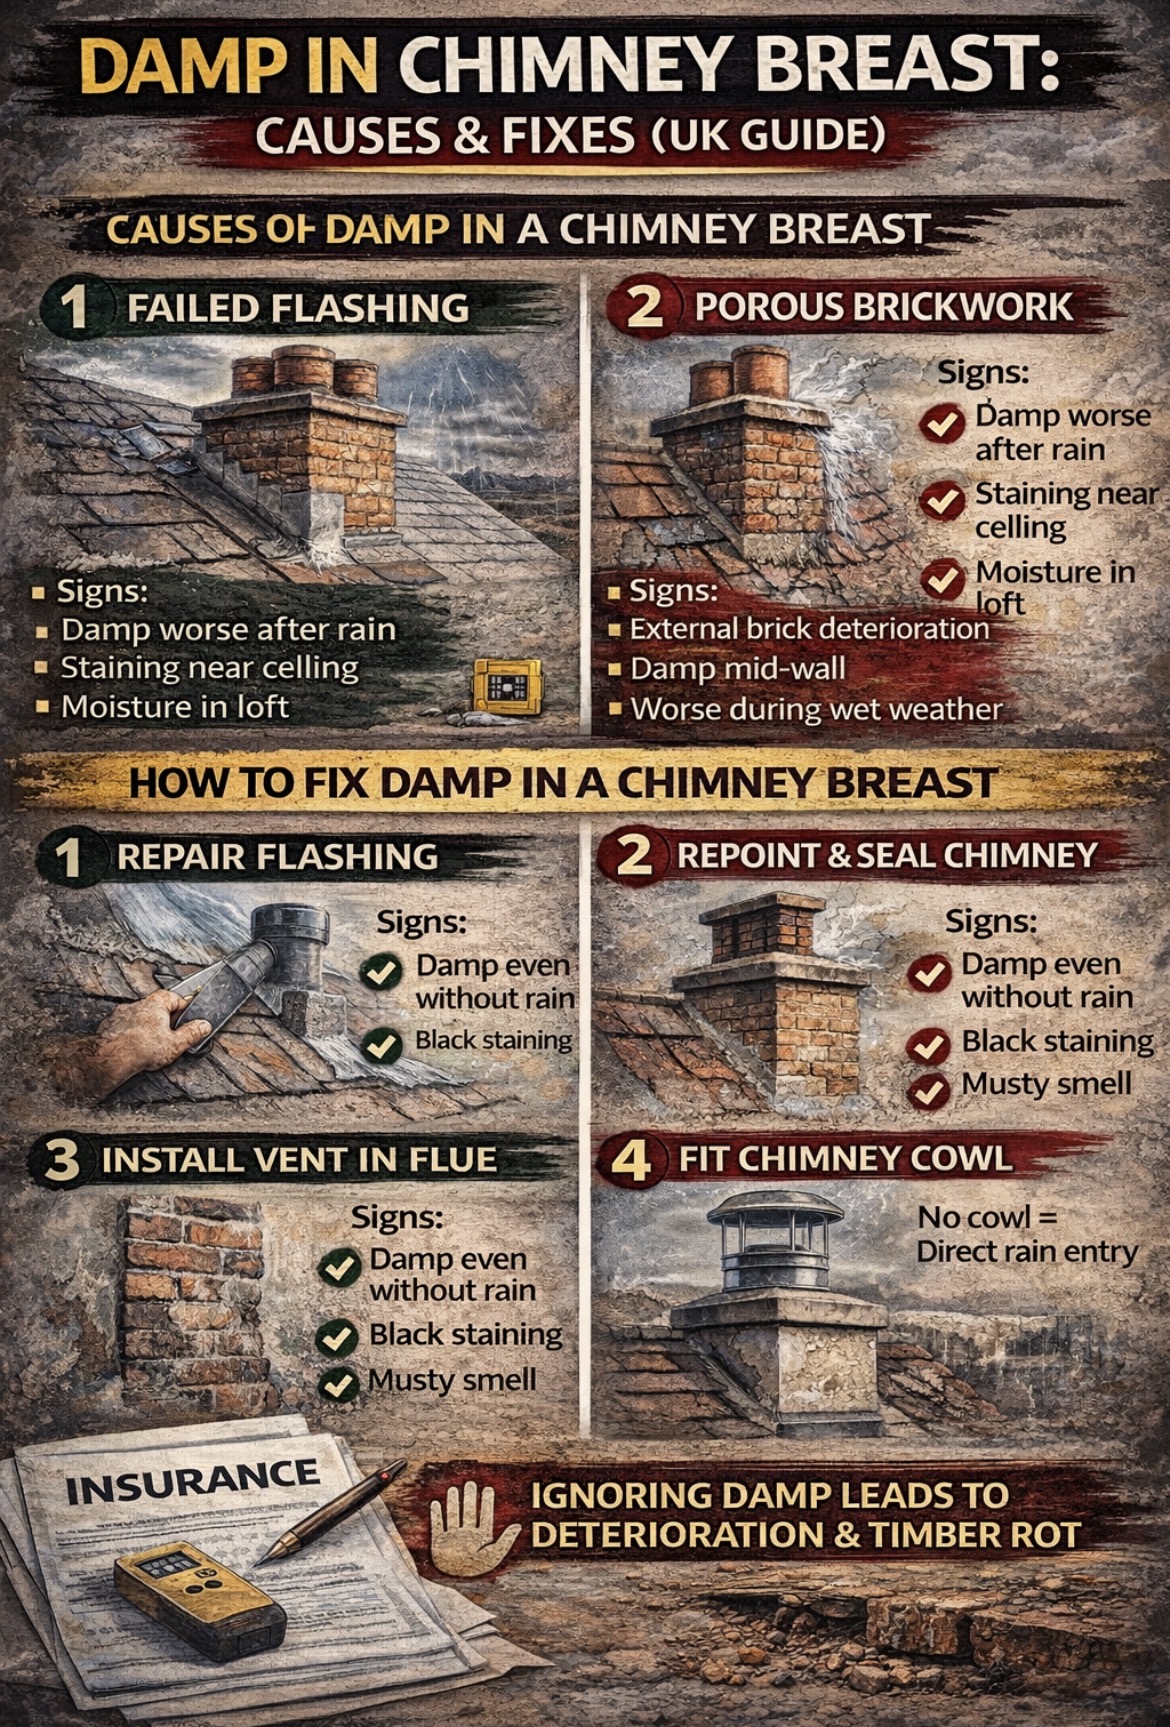
    Failed Flashing

    Flashing seals the gap between the chimney stack and roof.

    If damaged or lifted, water can enter and travel down the chimney breast.

    Signs:

    Porous Brickwork or Missing Pointing

    Older chimney stacks often suffer mortar erosion.

    This allows rainwater to soak into the stack and track downward.

    Signs:

    • External brick deterioration
    • Damp appearing mid-wall
    • Worse during wet weather

    Blocked or Unused Chimney Flue (Condensation)

    If a chimney is no longer used:

    • Warm air from inside the house rises
    • Meets cold air in the flue
    • Condensation forms
    • Moisture soaks into masonry

    Signs:

    • Damp even without rain
    • Black staining
    • Musty smell
    • Issue worse in winter

    Missing Chimney Cowl

    A chimney cowl prevents rain entering directly.

    Without one, water can fall straight down the flue.

    How to Diagnose the Cause

    Ask:

    • Is it worse after rain? → Likely flashing or brickwork
    • Is it constant, especially in winter? → Likely condensation
    • Is the chimney unused and sealed at the bottom? → Moisture may be trapped

    Roof-level inspection is often required for full diagnosis.

    How to Fix Damp in a Chimney Breast

    If Flashing Is Faulty:

    • Repair or replace flashing

    If Brickwork Is Porous:

    • Repoint chimney stack
    • Apply breathable water-repellent treatment

    If Condensation Is the Issue:

    • Install chimney vent
    • Fit appropriate cowl
    • Ensure airflow within the flue

    Avoid:

    • Simply replastering without fixing the cause
    • Sealing the chimney entirely without ventilation

    Can Damp in a Chimney Cause Structural Damage?

    If ignored, it can lead to:

    • Plaster failure
    • Timber rot near roof level
    • Internal mould growth
    • Masonry deterioration

    Early intervention usually prevents larger repair bills.

    Final Thoughts

    Damp in a chimney breast is common in UK homes and is usually caused by rain penetration or condensation within unused flues.

    The key is identifying whether the moisture is entering from outside or forming internally.

    Fix the source first — cosmetic repairs alone will not solve the issue.

  • Is Damp Covered by Home Insurance? (UK Guide)

    Is Damp Covered by Home Insurance? (UK Guide)

    Many homeowners assume damp damage will be covered by insurance, but it often depends on the cause such as penetrating damp, rising damp or condensation damp.

    Most UK home insurance policies distinguish between sudden events and gradual deterioration — and that difference is crucial.

    This guide explains when damp is likely to be covered and when it usually isn’t.

    Does Home Insurance Cover Damp?

    In general:

    • ✅ Sudden, unexpected damage may be covered
    • ❌ Gradual damp problems are usually not covered

    Insurance policies are designed for unforeseen events, not maintenance issues.

    When Damp 

    May

     Be Covered

    You may be covered if damp is caused by:

    Storm Damage

    If a storm damages:

    • Roof tiles
    • Flashing
    • Gutters

    And rainwater enters as a direct result, insurers may treat this as an insured event.

    Burst Pipes

    If a pipe suddenly bursts and causes water damage, this is typically covered under escape of water provisions.

    Accidental Damage (If Included)

    Some policies include accidental damage cover, but this depends on your specific terms.

    When Damp Is Usually NOT Covered

    Most insurers exclude:

    • Rising damp
    • Condensation
    • Long-term leaks
    • Poor maintenance
    • General wear and tear
    • Faulty workmanship

    If damp has developed gradually over time, it is unlikely to be covered.

    Why Rising Damp Is Rarely Covered

    Rising damp is considered:

    • A maintenance issue
    • A structural condition
    • Preventable through proper upkeep

    Because it develops over time, insurers usually exclude it.

    What About Penetrating Damp?

    It depends on the cause.

    If penetrating damp results from:

    • A sudden storm event → Possibly covered
    • Blocked gutters over months → Usually excluded

    The key factor is whether the damage was sudden and unforeseeable.

    What Should You Do If You Discover Damp?

    1. Check your policy wording carefully
    2. Look for terms like “gradual deterioration”
    3. Document the damage
    4. Take photographs
    5. Contact your insurer before starting major repairs

    Insurers may reject claims if repairs begin before inspection.

    Final Thoughts

    Most damp problems are considered maintenance issues and are not covered by standard home insurance policies.

    However, sudden damage caused by storms or burst pipes may be covered.

    Always review your specific policy terms before assuming you are insured.

  • How Much Does It Cost to Fix Damp? (UK Guide)

    How Much Does It Cost to Fix Damp? (UK Guide)

    The cost of fixing damp can vary significantly depending on the type of damp, the severity of the issue, and the repairs required.

    Some problems can be resolved for a few hundred pounds, while others may cost several thousand if structural work is needed.

    This guide explains typical UK cost ranges and what affects the final price.

    What Type of Damp Affects the Cost?

    The biggest factor is the type of damp, such as condensation damp, penetrating damp or rising damp.

    Condensation

      Typical cost: £0 – £1,500+

      Minor cases may only require:

      • Improving ventilation
      • Using extractor fans
      • Adjusting heating habits

      Costs increase if you need:

      • Positive Input Ventilation (PIV) system
      • Upgraded insulation
      • New extractor installations

      Condensation is usually the cheapest to fix.

      Penetrating Damp

      Typical cost: £150 – £2,500+

      Costs depend on the defect:

      If the issue is caught early, repairs are often moderate.

      Rising Damp

      Typical cost: £1,000 – £5,000+

      Costs may include:

      • Damp proof course injection: £1,000 – £3,000
      • Removing contaminated plaster
      • Replastering
      • Skirting board replacement

      Rising damp treatment can become expensive if widespread.

      What Else Affects the Price?

      Several factors influence total cost:

      • Property size
      • Access difficulty
      • Extent of plaster damage
      • Timber rot
      • Whether structural repairs are required
      • Location in the UK

      London and the South East typically cost more.

      Do You Always Need Damp Proofing Treatment?

      No.

      Many properties are misdiagnosed with rising damp when the real issue is condensation or penetrating damp.

      Treating the wrong problem can waste thousands of pounds.

      Proper diagnosis is critical before committing to major works.

      Can You Claim on Insurance?

      Most insurers:

      • Cover sudden damage (e.g. storm damage)
      • Do not cover gradual deterioration
      • Exclude lack of maintenance

      It’s important to check your individual policy wording.

      How to Avoid Overpaying

      • Get multiple quotes
      • Ask for a clear diagnosis
      • Avoid companies that immediately recommend injection systems without investigation
      • Address the root cause first

      Final Thoughts

      The cost of fixing damp depends entirely on the type and severity of the issue.

      Minor condensation problems may cost very little to resolve. Structural damp repairs can cost several thousand pounds if left untreated.

      Early identification almost always reduces repair costs.

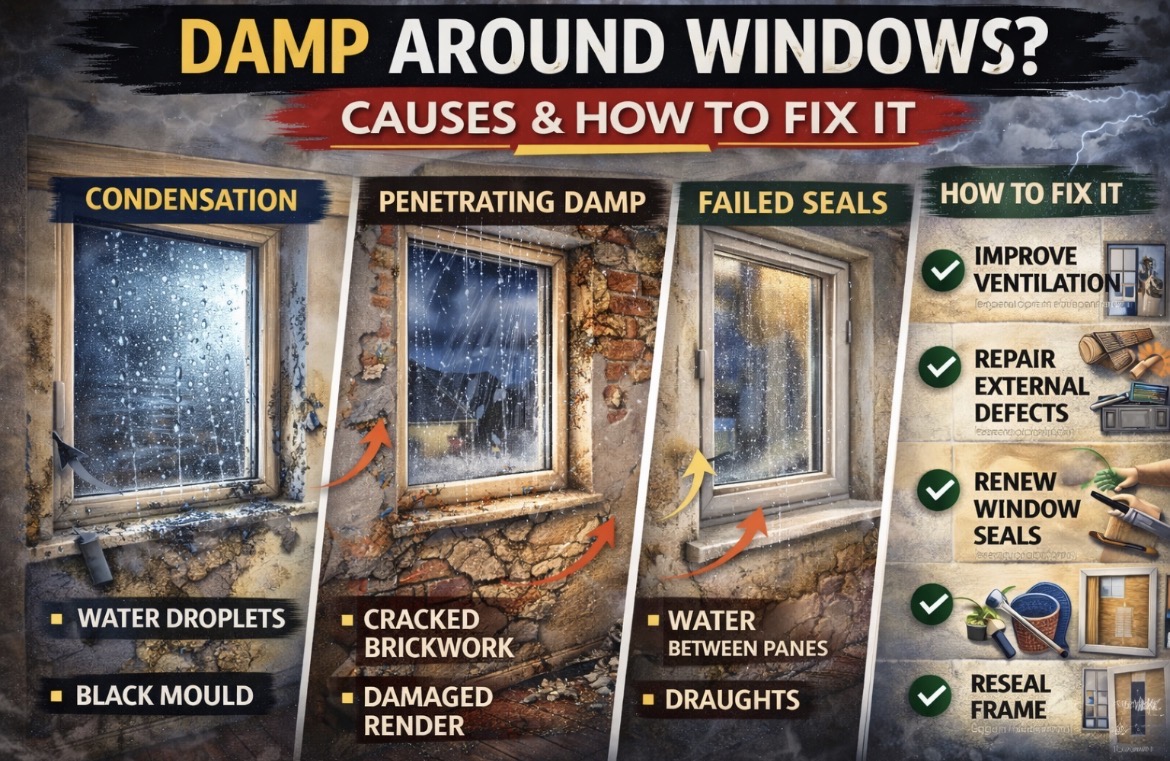
    1. Damp Around Windows: Causes, Diagnosis & How to Fix It

      Damp Around Windows: Causes, Diagnosis & How to Fix It

      Damp around windows is a common problem in many homes, particularly during colder months. It may appear as staining, peeling paint, black mould, or moisture pooling on window sills.

      The cause can vary — from simple condensation to external water penetration — so identifying the source is essential before attempting repairs.

      Why Does Damp Form Around Windows?

      Windows are natural weak points in a building’s structure. They interrupt insulation, create temperature differences, and rely on seals to prevent water ingress.

      Damp around windows is usually caused by one of three issues:

      1️⃣ Condensation (Most Common Cause)

      Condensation forms when warm, moist indoor air meets a cold window surface.

      Common signs:

      • Water droplets on glass
      • Black mould on window reveals
      • Worse in mornings
      • More noticeable in winter

      Condensation typically affects the surface rather than penetrating deep into the wall.

      Poor ventilation often makes this worse.

      2️⃣ Penetrating Damp

      If damp appears after rainfall, water may be entering from outside.

      Possible causes:

      • Cracked brickwork around the frame
      • Failed pointing
      • Damaged render
      • Blocked cavity trays
      • Poorly installed flashing

      Signs include:

      • Staining that worsens after rain
      • Damp patches extending beyond the immediate window area
      • Peeling paint higher up the wall

      3️⃣ Failed Window Seals

      Over time, window seals can degrade.

      Signs:

      • Damp limited to edges of frame
      • Water between glazing panes
      • Draughts around the window

      This is common in older double-glazed units.

      How to Diagnose the Real Cause

      Ask:

      • Is it worse after heavy rain? → Likely penetrating damp
      • Is it worse in cold mornings? → Likely condensation
      • Is there visible seal failure? → Likely window defect

      Pattern and timing are important indicators.

      How to Fix Damp Around Windows

      If It’s Condensation:

      If It’s Penetrating Damp:

      • Repoint brickwork
      • Repair render cracks
      • Clear blocked gutters
      • Check flashing
      • Inspect cavity trays

      If It’s Seal Failure:

      • Reseal frame edges
      • Replace damaged glazing units
      • Consider professional inspection

      When to Get Professional Advice

      You should consider further investigation if:

      • The damp spreads beyond the window area
      • Plaster feels soft or crumbling
      • Mould continues despite ventilation improvements
      • Timber frames show signs of rot

      Persistent moisture can eventually damage surrounding wall structures.

      Final Thoughts

      Damp around windows is common, especially in winter, but the cause determines the solution.

      Surface condensation requires ventilation improvements. Damp linked to rainfall usually points to external defects. Failed seals may require repair or replacement.

      Identifying the pattern is the key to resolving the issue properly.

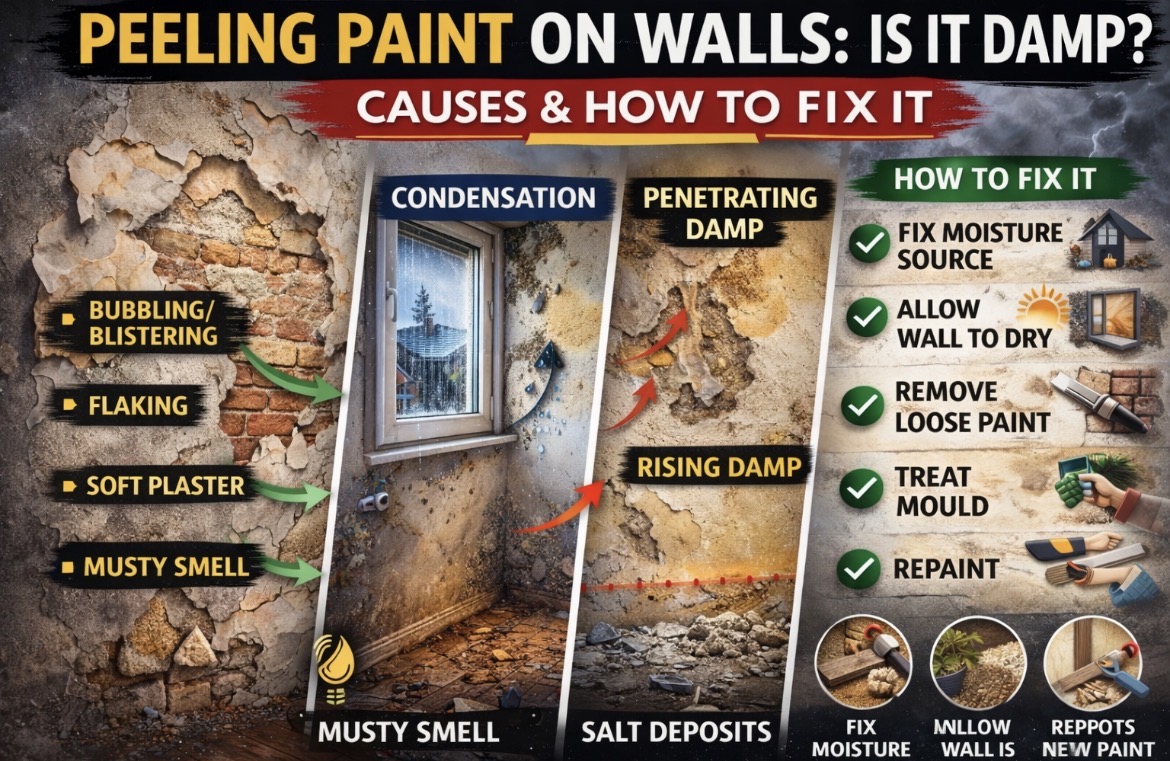
    2. Peeling Paint on Walls: Is It Damp & What Does It Mean?

      Peeling Paint on Walls: Is It Damp & What Does It Mean?

      If paint is peeling, bubbling or flaking off your walls, damp may be the underlying cause — but it’s not always the reason.

      Paint failure can happen due to moisture problems, poor surface preparation, or condensation. Identifying the cause is key before redecorating.

      This guide explains how to tell whether peeling paint is caused by damp and what to do next.

      What Does Damp-Related Peeling Paint Look Like?

      When moisture is trapped behind paint, it can cause:

      • Bubbling or blistering
      • Flaking in patches
      • Soft or crumbling plaster underneath
      • Discolouration or staining
      • A musty smell

      If the wall feels cold or slightly wet, damp is likely involved.

      Common Damp Causes of Peeling Paint

      1️⃣ Condensation

      Often found on:

      Signs:

      • Worse in winter
      • Black mould nearby
      • Peeling mostly at surface level

      Condensation causes repeated surface moisture, weakening the paint bond.

      2️⃣ Penetrating Damp

      Water entering from outside can push moisture through plaster.

      Signs:

      • Localised damp patches
      • Worse after rain
      • Peeling higher up walls
      • Staining or water marks

      This usually indicates an external defect.

      3️⃣ Rising Damp

      Less common, but possible.

      Signs:

      If peeling is only at low level, rising damp may be a factor.

      When It’s NOT Damp

      Paint can also peel due to:

      • Painting over dust or grease
      • Using the wrong type of paint
      • Applying paint to a damp surface during decorating
      • No mist coat on fresh plaster

      If the wall underneath is completely dry and solid, poor preparation may be the issue.

      How to Check Properly

      Before repainting:

      1. Press the wall — is it soft?
      2. Check for mould or staining
      3. Look at the height of the damage
      4. Monitor whether it worsens after rain
      5. See if it’s worse in winter mornings

      Patterns help identify the cause.

      How to Fix Peeling Paint Caused by Damp

      Step 1: Fix the moisture source first

      • Improve ventilation
      • Repair external defects
      • Clear gutters
      • Address leaks

      Step 2: Allow the wall to fully dry

      Step 3: Remove loose paint

      Step 4: Treat any mould

      Step 5: Repaint using appropriate primer and breathable paint where necessary

      Repainting without fixing damp will only result in repeat failure.

      When to Get Professional Advice

      Consider inspection if:

      • Plaster is crumbling
      • Damp keeps returning
      • Timber feels soft
      • You suspect structural issues

      Persistent moisture problems can lead to more serious damage if ignored.

      Final Thoughts

      Peeling paint is often an early warning sign of a moisture problem.

      The key is identifying whether it’s condensation, penetrating damp, rising damp — or simply poor preparation.

      Fix the cause before redecorating, and you’ll prevent the issue returning.

    3. Damp Only When It Rains: What It Means & How to Fix It

      Damp Only When It Rains: What It Means & How to Fix It

      If damp patches appear only during rainfall and seem to dry out afterwards, the issue is almost certainly external water penetration rather than rising damp.

      Rain-related damp problems usually indicate a defect in the building envelope that allows water to enter.

      This guide explains the most common causes and what you should check first.

      Why Does Damp Appear Only During Rain?

      Rainwater should be directed safely away from your property by:

      • Roof coverings
      • Flashing
      • Gutters and downpipes
      • External wall finishes
      • Drainage systems

      If any of these fail, water can track into walls or ceilings.

      When the weather improves, the moisture may partially dry — which is why the damp seems temporary.

      Most Common Causes

      1️⃣ Blocked or Overflowing Gutters

      Overflowing gutters allow water to cascade down walls instead of draining properly.

      Look for:

      • Water marks beneath gutter joints
      • Green staining on brickwork
      • Damp near ceiling lines

      2️⃣ Damaged Roof Tiles or Flashing

      Missing or slipped tiles allow water into roof spaces.

      Signs:

      • Damp ceilings after storms
      • Stains near chimney breasts
      • Drips in loft space

      3️⃣ Cracked Brickwork or Failed Pointing

      Wind-driven rain can penetrate weakened mortar joints.

      Signs:

      4️⃣ Faulty Window Seals

      Failed seals allow water ingress during heavy, wind-driven rain.

      Check for:

      Is It Rising Damp?

      Rising damp does not depend on rainfall.

      If damp:

      • Worsens only during rain
      • Appears higher than ground level
      • Dries between storms

      It is very unlikely to be rising damp.

      How to Confirm the Source

      Ask yourself:

      External inspection is critical.

      Sometimes the issue is visible from ground level, but roof problems may require closer inspection.

      How to Fix Damp That Appears During Rain

      The solution depends on the defect.

      Common repairs include:

      • Cleaning or replacing gutters
      • Repairing roof tiles
      • Repointing brickwork
      • Sealing cracks in render
      • Repairing flashing
      • Improving drainage

      Avoid cosmetic fixes like repainting until the source is resolved.

      When to Get Professional Help

      Consider professional inspection if:

      • The damp is spreading
      • You cannot identify the entry point
      • Timber feels soft or decayed
      • The issue keeps returning

      Early intervention is usually far cheaper than structural repairs later.

      Final Thoughts

      If damp appears only when it rains, the cause is almost always external water penetration.

      Focus on identifying the entry point, repairing the defect, and ensuring water is directed away from the building.

      Treating the symptom without fixing the source will not solve the problem long term.

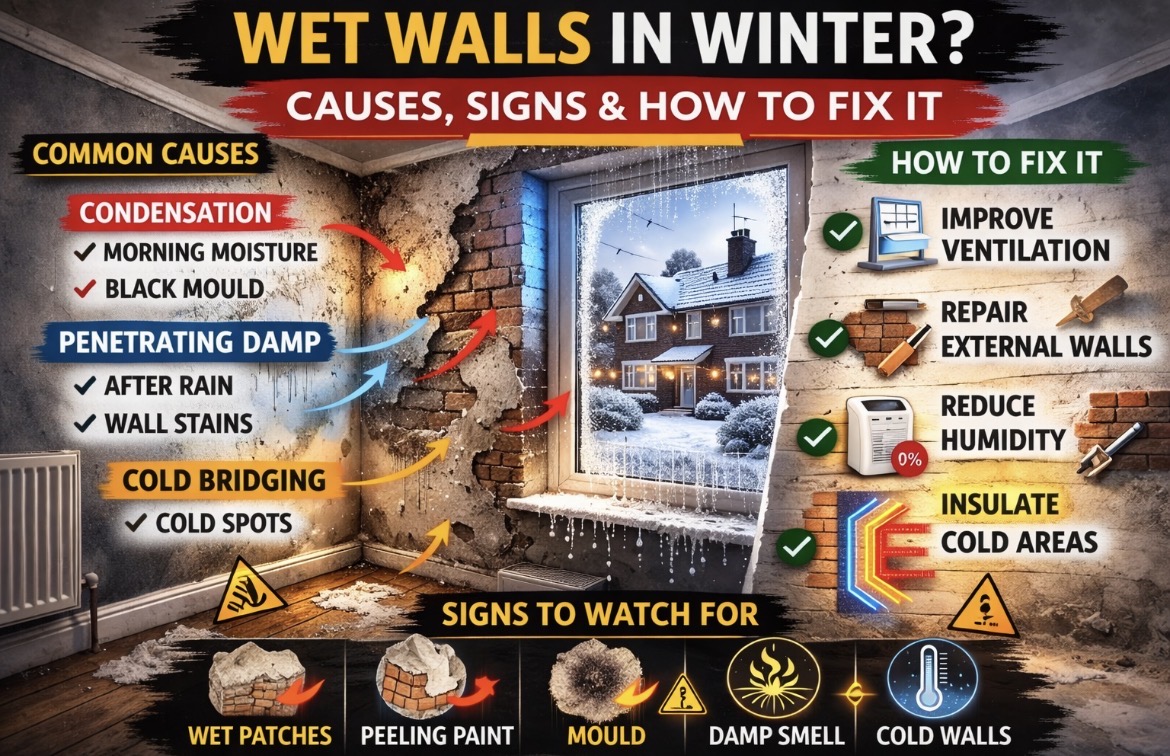
    4. Wet Walls in Winter: Causes, Condensation or Damp?

      Wet Walls in Winter: Causes, Condensation or Damp?

      If your walls feel wet or cold during winter, it can be difficult to know whether you’re dealing with condensation, penetrating damp, or something more serious.

      Winter increases moisture problems in many UK homes due to colder surfaces, reduced ventilation, and higher indoor humidity.

      This guide explains why walls become wet in winter and how to identify the real cause.

      Why Do Walls Feel Wet in Cold Weather?

      In winter:

      • Outdoor temperatures drop
      • Walls become colder
      • Indoor air contains moisture from cooking, showering and breathing
      • Warm air meets cold surfaces

      When warm, moist air touches a cold wall, condensation forms.

      But condensation isn’t the only possibility.

      Cause 1: Condensation (Most Common)

      Signs it’s condensation:

      • Appears in mornings
      • Worse after showers or cooking
      • Found on north-facing walls
      • Black mould in corners
      • Water droplets on windows

      Condensation is a surface moisture issue.

      It does not usually cause tide marks or salt deposits.

      Cause 2: Penetrating Damp

      Winter storms can drive rain into:

      Signs:

      • Damp patches worsen after rain
      • Localised staining
      • Peeling paint
      • Damp higher up on walls

      If the problem appears after heavy rain, it’s unlikely to be simple condensation.

      Cause 3: Cold Bridging

      Cold bridging happens where insulation is weak or missing.

      Common areas:

      • Around window reveals
      • Wall corners
      • Steel lintels
      • Concrete beams

      These spots become colder than surrounding walls, attracting condensation repeatedly.

      How to Tell Which Problem You Have

      Ask yourself:

      • Does it worsen after rain? → Likely penetrating damp
      • Is it worse in the morning? → Likely condensation
      • Is it only in winter? → Likely condensation or cold bridging
      • Is it at ground level with tide marks? → Possibly rising damp

      Patterns tell you more than the damp patch itself.

      How to Fix Wet Walls in Winter

      If Condensation:

      If Penetrating Damp:

      • Inspect gutters
      • Repair cracks
      • Repoint brickwork
      • Check roof tiles

      If Cold Bridging:

      • Improve insulation
      • Use thermal lining paper
      • Upgrade glazing

      Should You Be Concerned?

      Occasional winter condensation is common.

      But persistent damp can lead to:

      • Mould growth
      • Plaster damage
      • Timber decay

      If the issue continues outside winter, a professional inspection may be sensible.

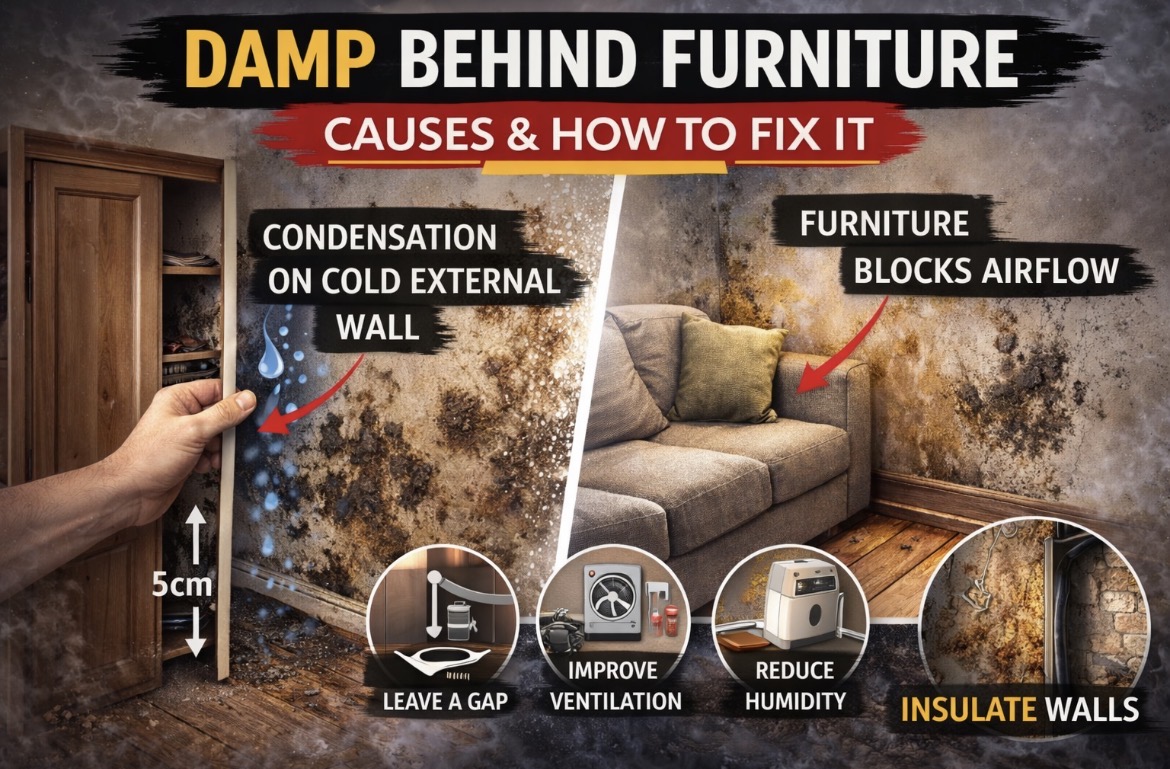
    5. Damp Behind Furniture: Causes, Diagnosis & How to Fix It (UK Guide)

      Damp Behind Furniture: Causes, Diagnosis & How to Fix It (UK Guide)

      If you’ve moved a wardrobe, sofa or bed and found damp or mould behind it — you’re not alone.

      In most cases, this is condensation, not rising damp.

      Furniture placed against cold external walls restricts airflow and creates the perfect environment for moisture to build up.

      Why Damp Forms Behind Furniture

      External walls are naturally colder — especially in winter.

      When warm indoor air hits a cold surface:

      • Moisture condenses
      • Air cannot circulate
      • The area stays damp
      • Mould begins to grow

      Large furniture blocks ventilation, trapping humidity against the wall.

      Signs It’s Condensation (Not Rising Damp)

      You’re likely dealing with condensation if:

      • The damp is only behind furniture
      • It’s worse in winter
      • There are black mould spots
      • The wall feels cold to touch
      • There are no tide marks near floor level

      Rising damp does not usually appear mid-wall behind furniture only.

      Common Risk Factors

      • Furniture pushed tightly against external walls
      • Solid wall properties (no cavity insulation)
      • Poor ventilation
      • High indoor humidity
      • Drying clothes indoors
      • Lack of extractor fans

      Modern sealed homes can actually increase condensation problems.

      How to Fix Damp Behind Furniture

      Create an Air Gap

      Leave at least 50mm (2 inches) between furniture and external walls.

      Improve Ventilation

      • Open trickle vents
      • Use extractor fans
      • Consider installing a PIV unit

      Reduce Indoor Humidity

      • Avoid drying clothes inside
      • Use lids on pans
      • Run a dehumidifier temporarily

      Consider Insulation Improvements

      If walls are extremely cold:

      Cleaning Existing Mould

      If mould is present:

      • Wear gloves and mask
      • Use a mould spray or diluted white vinegar
      • Do not dry-brush mould
      • Ensure area is fully dry before redecorating

      Always fix the moisture cause first.

      When It Might Not Be Condensation

      Investigate further if:

      • Plaster is blown or crumbling
      • Salts are visible
      • Damp extends beyond furniture area
      • There are signs of external defects

      In those cases, check for penetrating damp.

      Summary

      Damp behind furniture is usually caused by condensation on cold external walls, not rising damp.

      Improve airflow, reduce humidity, and allow walls to breathe — and the problem will usually resolve.

    6. Musty Smell in House But No Visible Damp? Causes & What To Do (UK Guide)

      Musty Smell in House But No Visible Damp? Causes & What To Do (UK Guide)

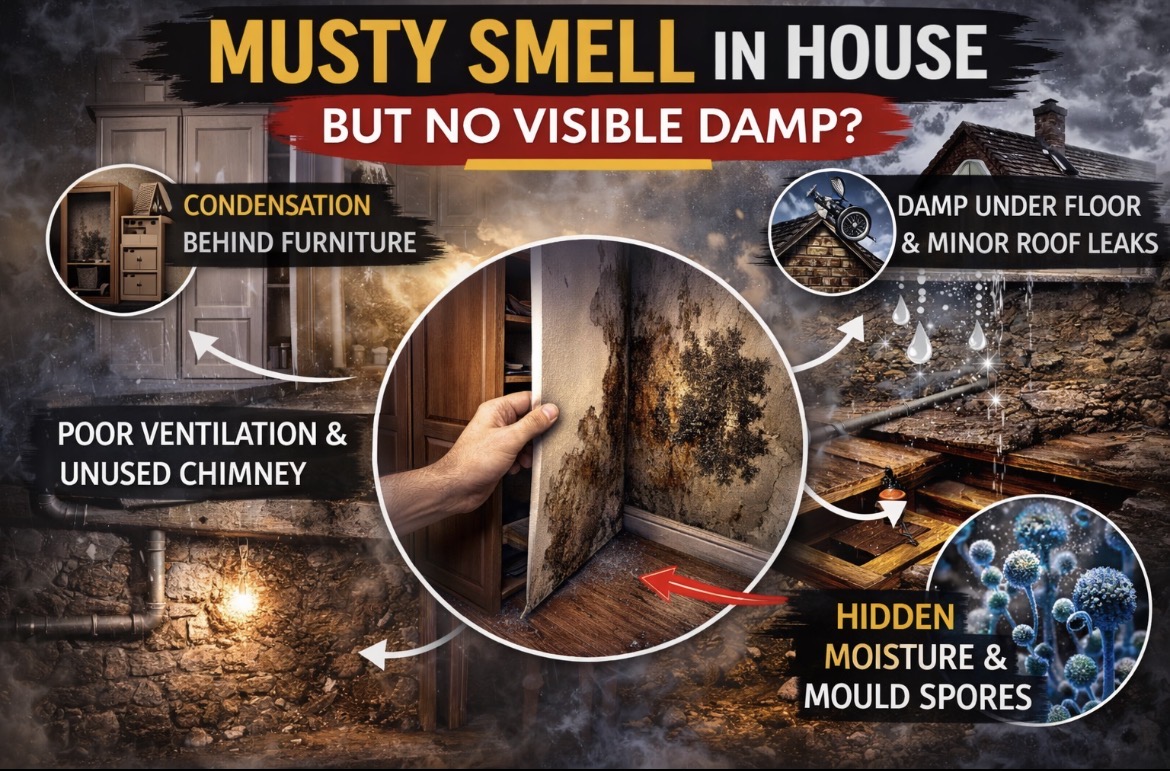
      If your home smells musty but you can’t see damp patches, there is usually hidden moisture somewhere.

      A musty odour is often the first warning sign of damp or mould growth.

      Ignoring it can allow the problem to worsen.

      Why Your House Smells Musty

      That stale, earthy smell is caused by:

      You may not see visible staining yet — but moisture is present.

      Most Common Causes

      Condensation Behind Furniture

      Large furniture placed against cold external walls blocks airflow.

      Moisture builds up and mould grows behind wardrobes or sofas.

      Poor Ventilation

      Modern sealed homes trap humidity.

      Lack of extractor fans or trickle vents increases condensation risk.

      Damp Under Floorboards

      Leaking pipes, blocked air bricks, or poor subfloor ventilation can create hidden damp beneath timber floors.

      Unused Chimneys

      Blocked or unvented flues trap moisture and cause internal damp smells.

      Minor Roof Leaks

      Small leaks may dampen insulation without immediately staining ceilings.

      Where to Check First

      • Behind wardrobes and beds
      • Inside cupboards on external walls
      • Around chimney breasts
      • Loft insulation
      • Under sinks
      • Beneath removable floorboards (if safe)

      Is It Dangerous?

      Musty smells usually indicate mould spores in the air.

      Long-term exposure may contribute to:

      • Respiratory irritation
      • Worsening asthma
      • Allergies

      Identifying and removing the moisture source is important.

      How to Fix a Musty Smell

      Step 1: Improve Ventilation

      • Open trickle vents
      • Use extractor fans
      • Consider a PIV unit
      • Open windows regularly

      Step 2: Reduce Humidity

      • Avoid drying clothes indoors
      • Use a dehumidifier temporarily

      Step 3: Find the Moisture Source

      If smell persists:

      • Check roof
      • Inspect plumbing
      • Assess external walls

      Do not mask the smell with air fresheners — treat the cause.

      When to Get a Damp Survey

      Consider professional inspection if:

      • Smell persists despite ventilation
      • Timber feels soft
      • Floor feels spongy
      • You suspect hidden leaks

      Early diagnosis prevents structural damage.

      Summary

      A musty smell with no visible damp almost always means hidden moisture or early mould growth.

      Increase ventilation, investigate cold spots, and identify the source before the issue worsens.

    7. Damp After Heavy Rain: Causes, Diagnosis & Fixes

      Damp After Heavy Rain: Causes, Diagnosis & Fixes

      If damp patches appear after heavy rain, the problem is almost always penetrating damp — not rising damp.

      Rainwater is entering your property through an external defect. The key is identifying where.

      Why Damp Appears After Rain

      Heavy rainfall exposes weaknesses in a building’s exterior.

      Common entry points include:

      • Blocked or leaking gutters
      • Cracked or slipped roof tiles
      • Damaged flashing around chimneys
      • Cracked render
      • Defective pointing
      • Failed window or door seals

      When rain hits these defects, water soaks into masonry and shows internally as a damp patch.

      Signs It’s Penetrating Damp (Not Rising Damp)

      You are likely dealing with penetrating damp if:

      • The patch appears or worsens after rain
      • It dries out during dry weather
      • It is higher up the wall
      • It appears on ceilings
      • It is near chimneys, windows or external walls

      Rising damp does not get worse only when it rains.

      Where to Check First

      1️⃣ Gutters and Downpipes

      Overflowing gutters are the most common cause.

      Look for staining on brickwork below the gutter line.

      2️⃣ Roof Coverings

      Check for:

      • Slipped tiles
      • Cracked slates
      • Damaged ridge tiles

      3️⃣ Chimney & Flashing

      Faulty lead flashing around chimneys frequently causes mid-wall damp patches.

      4️⃣ External Walls

      Look for:

      • Cracked render
      • Missing mortar joints
      • Spalled bricks

      How to Fix Damp After Heavy Rain

      The solution is always to fix the external defect first.

      Typical repairs include:

      • Clearing or replacing gutters
      • Replacing broken roof tiles
      • Repointing brickwork
      • Repairing render cracks
      • Renewing flashing

      Do not install a damp proof course unless a proper survey confirms rising damp.

      Injecting a DPC will not fix rainwater ingress.

      Typical UK Repair Costs

      Approximate costs:

      • Gutter repair: £100–£400
      • Roof tile replacement: £150–£600
      • Flashing repair: £300–£900
      • Repointing small area: £300–£800

      Costs depend on access and severity.

      When to Call a Professional

      You should seek a damp survey if:

      • The source is unclear
      • The patch continues spreading
      • Timber feels soft or rotten
      • There are signs of mould growth

      A proper inspection prevents unnecessary treatments.

      Prevention Tips

      • Clean gutters twice per year
      • Inspect roof after storms
      • Maintain pointing and render
      • Check chimney flashing regularly

      Prevention is significantly cheaper than internal repairs.

      Summary

      Damp that appears after heavy rain is almost always caused by external building defects.

      Fix the entry point, allow the wall to dry naturally, and redecorate only once moisture levels return to normal.

      Treat the cause — not just the symptom.